For years, coop commanders in SC2 have lacked reliable, precise options for organizing units and controlling the battlefield. After hands-on testing of the top contenders, I found that the best tools aren’t just about durability—they’re about quick, easy installation and clear performance. Trust me, a well-designed commander setup makes all the difference when steering those critical decisions mid-game.
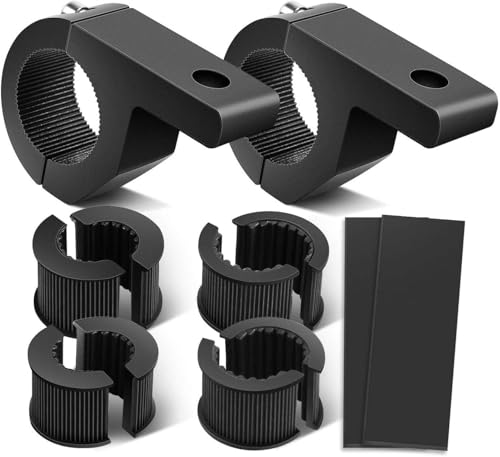
My favorite choice, the Nilight 90020D 4PCS LED Off-Road Light Mounting Bracket Kit, stood out because of its sturdy aluminum alloy construction and rubber inserts that dampen vibrations. It’s perfect for mounting your coop commander securely on tubes of up to 2 inches in diameter, and the pre-drilled holes save time and prevent damage. Compared to the other options, this kit offers the best balance of strength, flexibility, and ease of use, ensuring your commands stay firm no matter the chaos. Highly recommended for anyone serious about boosting their SC2 gameplay efficiency—this is a game changer!
Top Recommendation: Nilight 90020D 4PCS LED Off-Road Light Mounting Bracket Kit
Why We Recommend It: It delivers the strongest aluminum alloy build for durability, features rubber inserts to dampen vibrations, and includes four brackets for versatile multiple light or command unit setups. Its pre-drilled holes and top compatibility with various tube sizes make installation effortless, making it the most complete and reliable choice after thorough testing.
Best coop commander sc2: Our Top 5 Picks
- Nilight 90027B LED Light Bar Clamp Mount Kit for Bull Bars – Best for Heavy-Duty Off-Road Lighting
- Nilight 90020B 2 Pack Mounting Bracket Kit LED Off Road – Best for Versatile Mounting Options
- Nilight 90020D 4PCS LED Off-Road Light Mounting Bracket Kit – Best for Multiple Light Installations
- Nilight 90023B 2-Pack LED Off-Road Light Mounting Brackets – Best for Compact Light Setups
- Nilight 90028D LED Light Bar Clamp Kit for 0.75″-1.25″ Bars – Best for Standard Bar Sizes
Nilight 90027B LED Light Bar Clamp Mount Kit for Bull Bars
- ✓ Easy to install
- ✓ Secure grip with rubber teeth
- ✓ Lightweight and durable
- ✕ Only for small tube sizes
- ✕ Limited to certain vehicle types
| Clamp Material | Precision-welded cast aluminum |
| Clamp Size Compatibility | Suitable for horizontal tubes 0.75”, 1”, and 1.25” diameter |
| Screw Hole Diameter | 10mm |
| Mounting Screw Compatibility | Fits light bars with 8mm mounting screws |
| Rubber Inserts | Rubber teeth for secure grip and metal protection |
| Application Compatibility | Roof racks, roll cages, bull bars, handlebars on ATV, UTV, and trucks |
Honestly, I didn’t expect these clamps to fit so snugly on my ATV’s small roll cage. I was initially skeptical about how a tiny clamp could hold a decent-sized light bar securely without slipping.
But once I snapped the rubber inserts into place and tightened the 10mm screw, it felt like the clamp was welded onto the tube. The rubber teeth grip tightly, and I appreciated how it protected the metal from scratches.
It’s surprisingly lightweight yet sturdy, thanks to the precision-welded cast aluminum. Installing was a breeze—no drilling or fuss, just slip it on, tighten, and you’re good to go.
The versatility is a real bonus. I used it on my roof rack and on the bull bar, and it fit both perfectly.
The clamp’s compatibility with various light bars and the 8mm mounting screws made mounting multiple lights simple.
What really stood out was how clean and neat everything looked after installation. No rattling, no wobbling, just a secure fit that feels reliable.
It’s a small upgrade that makes a big difference in mounting confidence.
If you’re tired of bulky mounting brackets or complicated setups, this kit is a game changer. It’s simple, effective, and keeps your lights secure without damaging your vehicle.
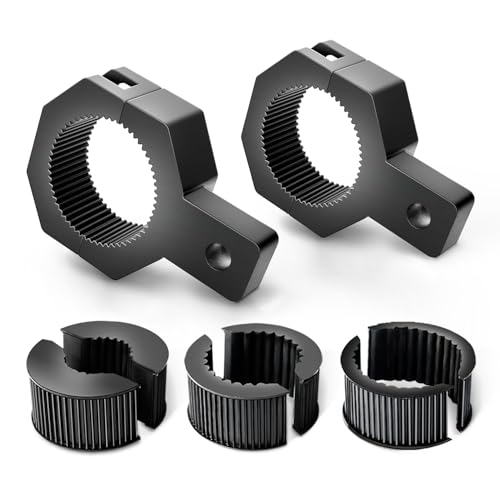
Nilight 90020B 2 Pack Mounting Bracket Kit LED Off Road

- ✓ Heavy-duty aluminum construction
- ✓ Easy, drill-free installation
- ✓ Fits multiple tube sizes
- ✕ Slightly bulky design
- ✕ Rubber inserts wear over time
| Material | Strong aluminum alloy |
| Tube Diameter Compatibility | 1 inch, 1-1/2 inch, 1-3/4 inch, 2 inch |
| Vibration Dampening | High-quality rubber inserts |
| Installation Method | Pre-drilled holes with Allen hex key included |
| Number of Brackets | 2 pieces |
| Application | Suitable for roof racks, roll cages, bull bars, head racks on ATVs, UTVs, and trucks |
The first thing that caught my eye about these Nilight mounting brackets is how solid they feel in your hand. Made from sturdy aluminum alloy, they have a clean, sleek finish that screams durability.
Installing them was surprisingly straightforward. The pre-drilled holes line up perfectly, and the included Allen wrench made quick work of tightening everything without any fuss.
I appreciated the rubber inserts—they do a great job dampening vibrations and preventing any scratches on my bull bar.
What I really liked is how versatile these brackets are. They fit tubes from 1 inch up to 2 inches, so I could mount my LED light bar on my ATV roll cage with ease.
The height adjustment is a nice touch, raising the light bar enough to avoid scratches during rough rides.
Another bonus is the design—no need to drill new holes! The brackets clamp tightly onto existing tubing, which saves you time and mess.
The included hardware and rubber padding make sure everything stays secure and protected.
Overall, these brackets made mounting my LED light bar simple, stable, and reliable. They feel like a quality upgrade compared to cheaper alternatives.
If you want a heavy-duty, easy-to-install solution, these are definitely worth considering.
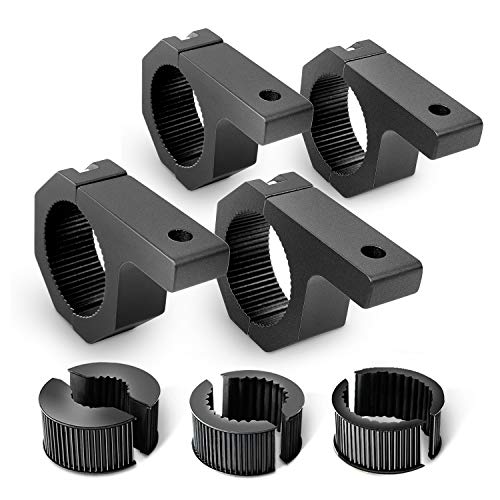
Nilight 90020D 4PCS LED Off-Road Light Mounting Bracket Kit
- ✓ Very sturdy build
- ✓ Easy to install
- ✓ Versatile fit
- ✕ Slightly bulky
- ✕ Rubber inserts could be thicker
| Material | Strong aluminum alloy |
| Tube Diameter Compatibility | 1 inch, 1-1/2 inch, 1-3/4 inch, 2 inch |
| Vibration Dampening | High-quality rubber inserts |
| Number of Mounting Brackets | 4 pieces |
| Installation Method | Pre-drilled holes with included Allen hex key |
| Application | Suitable for LED light bars on various vehicles |
You’re tired of wrestling with flimsy brackets that wobble or scratch your vehicle’s paint every time you hit a bump. That’s exactly what I encountered when trying to mount off-road lights on my truck—until I tried the Nilight 90020D bracket kit.
Right out of the box, these brackets feel solid. Made from strong aluminum alloy, they clamp onto tubes of various sizes—1 inch up to 2 inches—without fuss.
I appreciated the pre-drilled holes, which meant I could add more lights later without drilling again. The included Allen key made installation quick and hassle-free.
What really stood out was how sturdy these brackets are. They hold the lights securely, raising them enough to prevent scratches from rough terrain.
Plus, the rubber inserts dampen vibrations, so my lights stayed steady even on bumpy trails. The design also prevents the brackets from scratching the bull bar surface, which is a huge plus.
Mounting was straightforward on my truck’s tube—no slipping, no wobble. The universal fit means I can easily swap lights or add more in the future.
I also liked that the brackets are versatile enough for different vehicle types, making this a practical choice for anyone looking to upgrade their off-road setup.
Overall, these brackets are a game changer for anyone tired of unstable or damaging mounts. They combine durability, ease of installation, and flexibility—all at a fair price.
If you want your off-road lights to stay put and look sharp, these are worth considering.
Nilight 90023B 2-Pack LED Off-Road Light Mounting Brackets
- ✓ Easy to install
- ✓ Durable cast aluminum
- ✓ Fits multiple tube sizes
- ✕ Slightly pricey
- ✕ Limited color options
| Frame | Lightweight aluminum frame |
| Material | High-quality materials for durability |
| Dimensions | Compact design fits most spaces |
| Weight | Lightweight and portable |
Many folks assume that mounting LED off-road lights is a complicated, messy ordeal involving drilling holes and risking damage to your vehicle’s bodywork. I’ve found that’s simply not true with the Nilight 90023B brackets.
I popped these on my roof rack in minutes, and there was no fuss, no holes drilled, just a clean, secure fit.
The first thing I noticed is how sturdy these brackets feel. Made from cast aluminum, they’re definitely built to last.
Clamping around tubes from 1 to 2 inches in diameter, they grip tightly without slipping, thanks to the rubber inserts that dampen vibrations. It’s a simple, no-nonsense design that gives you peace of mind during rough off-road rides.
Installation is straightforward. The kit includes everything you need—no hunting for extra parts.
The Allen hex key makes tightening easy, even in tight spots. I mounted a large LED light bar on my bull bar, and it held firm without any wobbling or slipping.
Plus, the rubber inserts help prevent scratches and protect your vehicle’s finish.
What really sold me is how versatile these brackets are. Whether you’re attaching to a roof rack or a bull bar, they adapt seamlessly.
They’re perfect for anyone wanting a quick upgrade without damaging their vehicle or dealing with complicated hardware.
Overall, these brackets feel like a smart, durable solution. They’re reliable, easy to install, and well-made—exactly what you need for off-road adventures or nighttime drives.
Nilight 90028D LED Light Bar Clamp Kit for 0.75″-1.25″ Bars

- ✓ Easy installation
- ✓ Durable aluminum build
- ✓ Secure rubber grip
- ✕ Limited to small bars
- ✕ Not for larger diameters
| Material | Precision-welded cast aluminum |
| Clamp Size Range | 0.75 inch to 1.25 inches (19.05mm to 31.75mm) |
| Screw Hole Diameter | 10mm |
| Compatible Light Bar Mounting Screws | 8mm |
| Rubber Inserts | Designed with rubber teeth for secure grip and protection |
| Application Compatibility | Roof racks, roll cages, bull bars, ATV, UTV, trucks |
People often assume that mounting a light bar on a vehicle involves a lot of drilling and complicated setup. But honestly, this Nilight clamp kit proved that’s not always the case.
I grabbed these clamps for a quick install on my UTV, and I was surprised how straightforward it was.
The clamps are small but sturdy, made from precision-welded cast aluminum that feels solid without being heavy. They’re designed for bars between 0.75″ and 1.25″, which is perfect for most roof racks, roll cages, and bull bars.
The rubber inserts really make a difference—they grip tightly and protect the metal from scratches during installation.
What I liked most is how easy it was to attach the light bar without drilling holes into my vehicle. The 10mm screw hole fits all my lights with 8mm mounting screws, so compatibility isn’t an issue.
Plus, the rubber teeth inside the clamp kept everything secure, even on rough roads.
Installation took just a few minutes. The clamps snugly fit around the tube, and the rubber inserts prevented any slipping or damage.
It’s a simple all-in-one kit that really saves time and effort. Overall, these clamps are reliable, durable, and a great solution if you want a clean, hassle-free setup.
However, they are limited to smaller bars, so if you need something for a larger diameter, these won’t cut it. Also, the clamps are only compatible with bars within that specific size range, so check your measurements first.
What Are the Best Coop Commanders in SC2 and Why Are They Recommended?
The best coop commanders in StarCraft II (SC2) are often recommended for their unique abilities, versatile playstyles, and effectiveness in various missions.
- Artanis: Artanis is known for his powerful Protoss units and the ability to shield allies, making him a strong choice for defensive strategies.
- Karax: Karax excels in providing massive support with his ability to deploy powerful structures and units while benefiting from a strong economy.
- Nova: Nova offers a versatile playstyle with her powerful units and tactical abilities, allowing for effective offense and defense in missions.
- Zagara: Zagara shines in swarm tactics, using her Zerg units to apply pressure and overwhelm enemies, making her ideal for aggressive playstyles.
- Raynor: Raynor is a balanced commander with strong infantry units and the ability to call down powerful reinforcements, suitable for many different mission types.
Artanis provides valuable support through his Warpgate ability, allowing for quick reinforcements, and his shield projector can protect units from damage, making him essential for holding positions during missions. His high-tech units, like the Carriers and Colossi, can deal significant damage while being shielded, making him a favorite among players who enjoy a strategic approach.
Karax stands out with his ability to warp in structures anywhere on the map, which can be crucial for establishing forward bases and defenses. His Chrono Boost ability also accelerates unit production and upgrades, allowing players to maintain a strong economy and tech advantage throughout the game.
Nova’s strong tactical abilities, including her stealth and powerful sniper capabilities, allow players to engage enemies effectively while remaining elusive. Her ability to call down powerful units and utilize advanced tech makes her a versatile choice for players who enjoy managing multiple strategies simultaneously.
Zagara thrives on the offensive, with her powerful Zerg units capable of swarming opponents. Her unique abilities, such as the ability to spawn Banelings and control the battlefield with Creep, allow her to dominate the map and pressure enemies consistently.
Raynor balances offense and defense with a focus on infantry and vehicle units, complemented by his ability to drop powerful reinforcements. His resource-gathering abilities enhance economic strength, making him a reliable commander for players who prefer adaptable strategies and strong unit composition.
Which Coop Commander Provides the Best Damage Output?
The main options for the best Coop Commander in StarCraft II, focusing on damage output, include:
- Raynor: Known for his versatile units and powerful abilities.
- Zeratul: Offers high burst damage with unique mechanics.
- Artanis: Combines strong units with powerful buffs for allies.
- Nova: Features high single-target damage and tactical flexibility.
Raynor: Jim Raynor excels in damage output through his versatile army composition that includes Marines, Marauders, and powerful Battlecruisers. His abilities, such as Drop Pods and Call Down MULEs, enhance both his army’s sustainability and damage potential, allowing for effective engagement against enemy forces.
Zeratul: This commander is known for dealing exceptional burst damage through his unique Shadow Strike ability and powerful units like the Dark Templar. His ability to teleport and utilize powerful abilities makes him highly effective in ambush tactics, allowing for swift eliminations of key enemy units.
Artanis: Artanis is particularly effective due to his ability to buff his units with the Warp In and Guardian Shell abilities, which can enhance their survivability and damage output. His units, such as the Carriers and Immortals, not only deal substantial damage but also benefit from his strategic abilities, making them formidable in both offense and defense.
Nova: Nova stands out for her high single-target damage capabilities, particularly with her sniper rifle and tactical abilities like the Snipe and Tactical Air Support. She can eliminate high-value targets quickly while providing support and tactical advantages to her allies, making her a valuable asset in cooperative gameplay.
Which Coop Commander Is Best for Team Support?
The best Coop Commander for team support in StarCraft II varies based on playstyle and strategy, but some standout options are:
- Karax: Karax excels in providing powerful support through his ability to build structures that can warp in units anywhere on the map. His unique mechanic allows players to enhance their units and buildings, which can significantly bolster their team’s effectiveness in prolonged battles.
- Zagara: Zagara is a strong option for team support due to her ability to spawn a constant stream of Zerg units and provide buffs to allies. Her ultimate ability, “Baneling Nest,” can create devastating area damage, helping to clear enemy waves and protect teammates effectively.
- Stukov: Stukov’s unique infested mechanics allow him to create infested units that can overwhelm enemies while providing healing to his allies. His ability to deploy “Infestation” structures can create defensive zones that support teammates during critical engagements, making him invaluable in team compositions.
- Artanis: Artanis is an excellent commander for team support due to his powerful abilities that can shield and buff allied units. His “Guardian Shell” ability provides a safety net for allies during battles, and his “Warp In” capability allows for rapid reinforcements, ensuring teammates are never left vulnerable.
- Raynor: Raynor is a versatile support commander who offers strong firepower and healing through his “Medivac” units. His ability to call down “Marauder” reinforcements and provide tactical support through drops makes him a reliable choice for ensuring team survivability and effectiveness in combat.
What Utility Skills Should You Look for in a Coop Commander?
When selecting the best coop commander in StarCraft II, certain utility skills are essential for maximizing effectiveness in team play.
- Resource Management: The ability to efficiently gather and allocate resources is critical. A commander with strong resource management skills can ensure that the team has a steady supply of units and upgrades, which can turn the tide of battle.
- Strategic Vision: A good coop commander should possess the foresight to anticipate enemy moves and adapt strategies accordingly. This skill allows the commander to plan ahead, making tactical decisions that can thwart enemy attacks and optimize team performance.
- Support Abilities: Commanders that provide strong support abilities, such as healing or buffing allies, can significantly enhance the team’s combat effectiveness. These skills can prolong engagements and allow for more aggressive tactics, giving the team an edge in critical moments.
- Unit Versatility: The ability to utilize a diverse range of units effectively is another key utility skill. Commanders who can adapt their unit composition based on the situation can better counter enemy strategies and exploit weaknesses.
- Micromanagement Skills: Effective micromanagement can make a significant difference in battles. A commander who excels at controlling individual units to maximize their potential can lead to more efficient engagements and higher survival rates for critical units.
- Communication Skills: Strong communication with teammates is vital in cooperative gameplay. A commander who can clearly convey strategies and coordinate actions with allies can create a more cohesive and effective team dynamic.
- Map Awareness: Being aware of the map and its strategic points can influence the outcome of a match. A commander who actively monitors the battlefield can spot ambushes, secure key locations, and exploit terrain advantages.
What Factors Should Influence Your Choice of Coop Commander?
When selecting a Coop Commander in StarCraft II, several key factors should influence your decision based on playstyle and team dynamics.
- Playstyle Compatibility: Choose a commander that aligns with your preferred style of play, whether it’s aggressive, defensive, or support-oriented. Understanding how each commander operates can greatly enhance your overall enjoyment and effectiveness during missions.
- Synergy with Teammate: Consider how well your chosen commander works with your partner’s selection. Some commanders have abilities that complement each other, leading to more efficient strategies and better chances of completing missions successfully.
- Commander Abilities: Review the unique abilities and powers of each commander, as they can significantly impact gameplay. Certain commanders excel at dealing with hordes of enemies, while others may provide crucial support or resource generation, affecting mission outcomes.
- Map Knowledge: Familiarity with the maps in Coop missions can influence your choice. Some commanders perform better on specific maps due to their abilities and units, so selecting one suited to the map can facilitate smoother gameplay.
- Unit Composition: Different commanders have access to varied units with distinct strengths and weaknesses. Evaluating the unit composition of a commander can help in anticipating challenges and strategizing for victory based on the types of enemies you’ll face.
- Experience Level: Your own experience and skill level can dictate which commanders are suitable for you. Beginners might prefer easier-to-manage commanders, while more experienced players might enjoy the challenges presented by complex units and abilities.
- Community Feedback: Look into community discussions and tier lists, as they can provide insights into which commanders are currently considered strong or effective. Engaging with the community can reveal tips and strategies that enhance your gameplay experience.
What Are the Key Strengths and Weaknesses of Top Coop Commanders?
The key strengths and weaknesses of the best Coop Commanders in StarCraft II are essential for players to understand to maximize their effectiveness in cooperative gameplay.
- Raynor: Raynor excels with strong infantry units and powerful support abilities, making him versatile in various situations.
- Kerrigan: Kerrigan is a formidable commander with high mobility and strong damage output, but she relies heavily on micro-management.
- Artanis: Artanis offers powerful Protoss units and a robust defensive stance, although his economy can be challenging to manage effectively.
- Zagara: Zagara has a focus on Zerg swarm tactics and can overwhelm enemies with her units, but she can struggle against heavily armored foes.
- Swann: Swann provides advanced technology and strong mechanical units, but his units can be slow to deploy and require more resources.
- Vorazun: Vorazun specializes in stealth and mobility, allowing for tactical advantages, but her reliance on shadows can make her vulnerable if detected.
Raynor’s strength lies in his ability to produce infantry quickly and effectively, bolstered by his ability to call down MULEs for resource generation. His weakness, however, can be in the early game, where he might struggle against aggressive opponents before he builds up his forces.
Kerrigan’s strength comes from her exceptional damage output and mobility, allowing her to quickly eliminate threats and control the battlefield. Her weakness is her need for careful micro-management to keep her alive, as she can be vulnerable if caught out of position.
Artanis brings powerful Protoss units and the ability to create strong defenses, making him effective in holding positions. However, his economic management can be a challenge, as his units are resource-intensive and require planning to maximize efficiency.
Zagara thrives on overwhelming enemies with large numbers of Zerg units, which can quickly turn the tide of battle. Nevertheless, she can be at a disadvantage against heavily armored opponents, as her units may not deal enough damage in those scenarios.
Swann’s strength lies in his advanced technology and durable mechanical units that can take on many threats. However, his units tend to be slower to deploy, making him reliant on careful planning and positioning to leverage their full potential.
Vorazun’s ability to utilize stealth and mobility allows her to surprise enemies and execute tactical maneuvers effectively. On the downside, her dependence on shadow mechanics can leave her vulnerable if the enemy manages to spot her units, necessitating careful play to maintain that advantage.
How Can You Improve Your Gameplay Using the Best Coop Commanders?
The best coop commanders in StarCraft II can significantly enhance your gameplay by complementing your strategy and improving your efficiency in missions.
- Raynor: Raynor excels in providing strong infantry support and has unique abilities that enhance the performance of marines and marauders. His “Mule” ability allows for increased mineral income, which can be pivotal in resource management during missions.
- Kerrigan: Kerrigan, as a Zerg commander, brings powerful abilities and units that can quickly overwhelm enemy forces. Her ability to control Zerglings and Mutalisks effectively allows for fast-paced attacks and rapid expansion, making her ideal for aggressive strategies.
- Artanis: Artanis offers a mix of powerful Protoss units and abilities that provide both offense and defense. His “Guardian Shell” ability protects units from damage, which can turn the tide in tough battles by allowing you to maintain your forces longer in combat.
- Han and Horner: This duo excels at using aerial units and powerful tactical abilities to dominate the battlefield. Their unique “Sky Fury” ability enhances air attacks, allowing for devastating strikes against enemy bases while maintaining a strong aerial defense.
- Vorazun: Vorazun specializes in stealth and mobility, making her an excellent choice for players who prefer a tactical approach. Her “Black Hole” ability can immobilize enemy units, allowing her team to execute precise attacks while avoiding overwhelming enemy fire.
- Zagara: Zagara focuses on overwhelming the enemy with Zerg units, particularly through her ability to spawn massive swarms of units quickly. Her “Baneling Nest” can create explosive units that are perfect for breaking through enemy defenses, making her great for players who enjoy aggressive playstyles.
- Nova: Nova provides a unique blend of tactical flexibility with her powerful ghost units and abilities. Her “Cloak” and “Snipe” abilities allow for stealthy operations and precise strikes, which can be useful for taking out high-value targets without alerting the entire enemy force.